Use GitHub Codespaces
You can run BGP labs in (free1) GitHub codespaces; all you need is a GitHub account:
- Create a new codespace for your BGP labs or connect to an existing codespace.
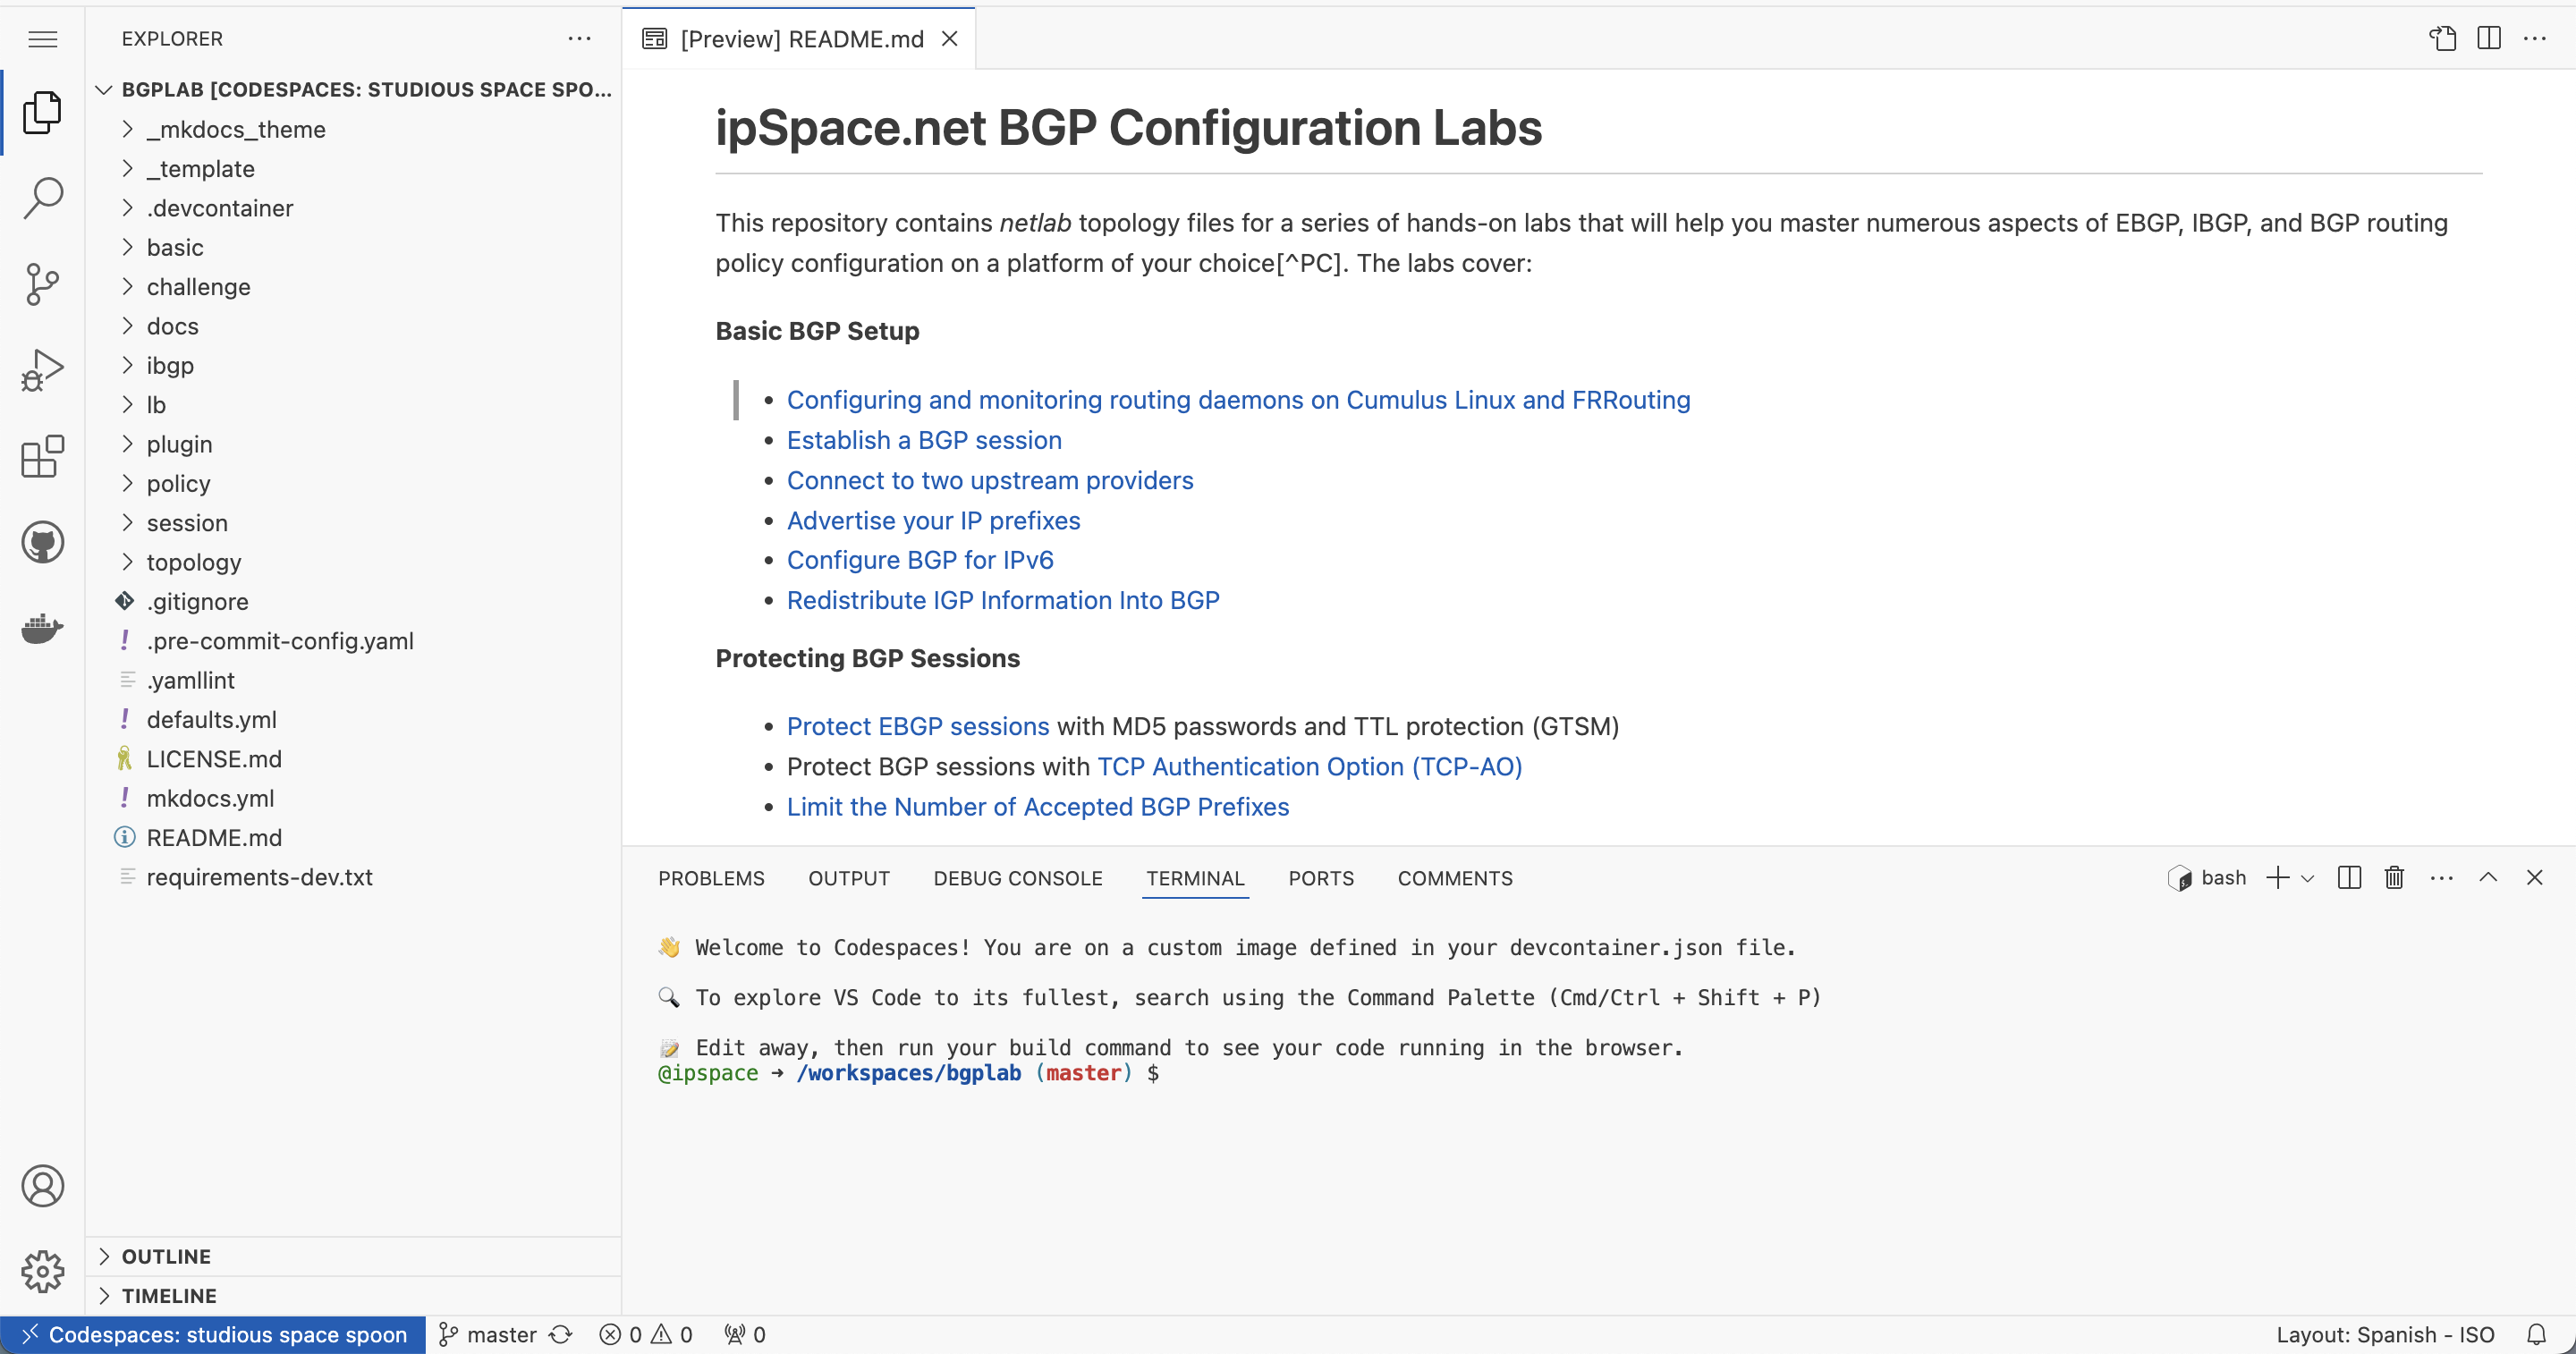
- Unless you’re using GitHub codespaces with VS Code (in which case you know what to do), your codespace opens in a new browser window with three tabs: Explorer (repository folders), Preview (starting with README), and Terminal.
Select Lab Devices
The BGP labs repository uses a recent FRRouting container as the default device. You can change that with the netlab defaults --project device=_value_ command executed in the top directory (where the terminal window opens) or edit the defaults.yml file with a text editor like vi or nano.
For example, the following command changes the user lab devices to SR Linux2:
$ netlab defaults --project device=srlinux
The default setting device is already set in project defaults
Do you want to change that setting in project defaults [y/n]: y
device set to srlinux in /home/user/bgp/defaults.yml
Here are a few device selection guidelines:
- It’s best to use network devices with free-to-download container images:
| Device | Device type to use in defaults.yml |
|---|---|
| FRRouting | frr |
| Nokia SR Linux | srlinux |
| VyOS | vyos |
Tip
If you want to use the default settings but have never worked with FRRouting before, start with the Configuring FRRouting exercise.
- Use FRRouting to use the 2 CPU/8 GB codespaces VM with more extensive labs. Other containers, like Arista cEOS or Nokia SR-Linux, need more memory.
- Codespaces have persistent storage; you can download and install other containers.
- To use containers that have to be downloaded from the vendors’ website, download them onto your laptop, drag-and-drop them into the Folders, and install them like you would on a local netlab instance.
- While it looks like the Codespaces environment supports nested virtualization, the environment does not include the
kvmkernel module, so you cannot start virtual machines in Codespaces. That also precludes running VMs in virtual machines (the vrnetlab approach).
Start a Lab
Once you have the codespaces up and running:
- Click on the desired lab exercise in the README.md preview window to select the exercise folder.
- Right-click on the exercise folder and select “Open in Integrated Terminal” to launch a bash session in the desired directory.
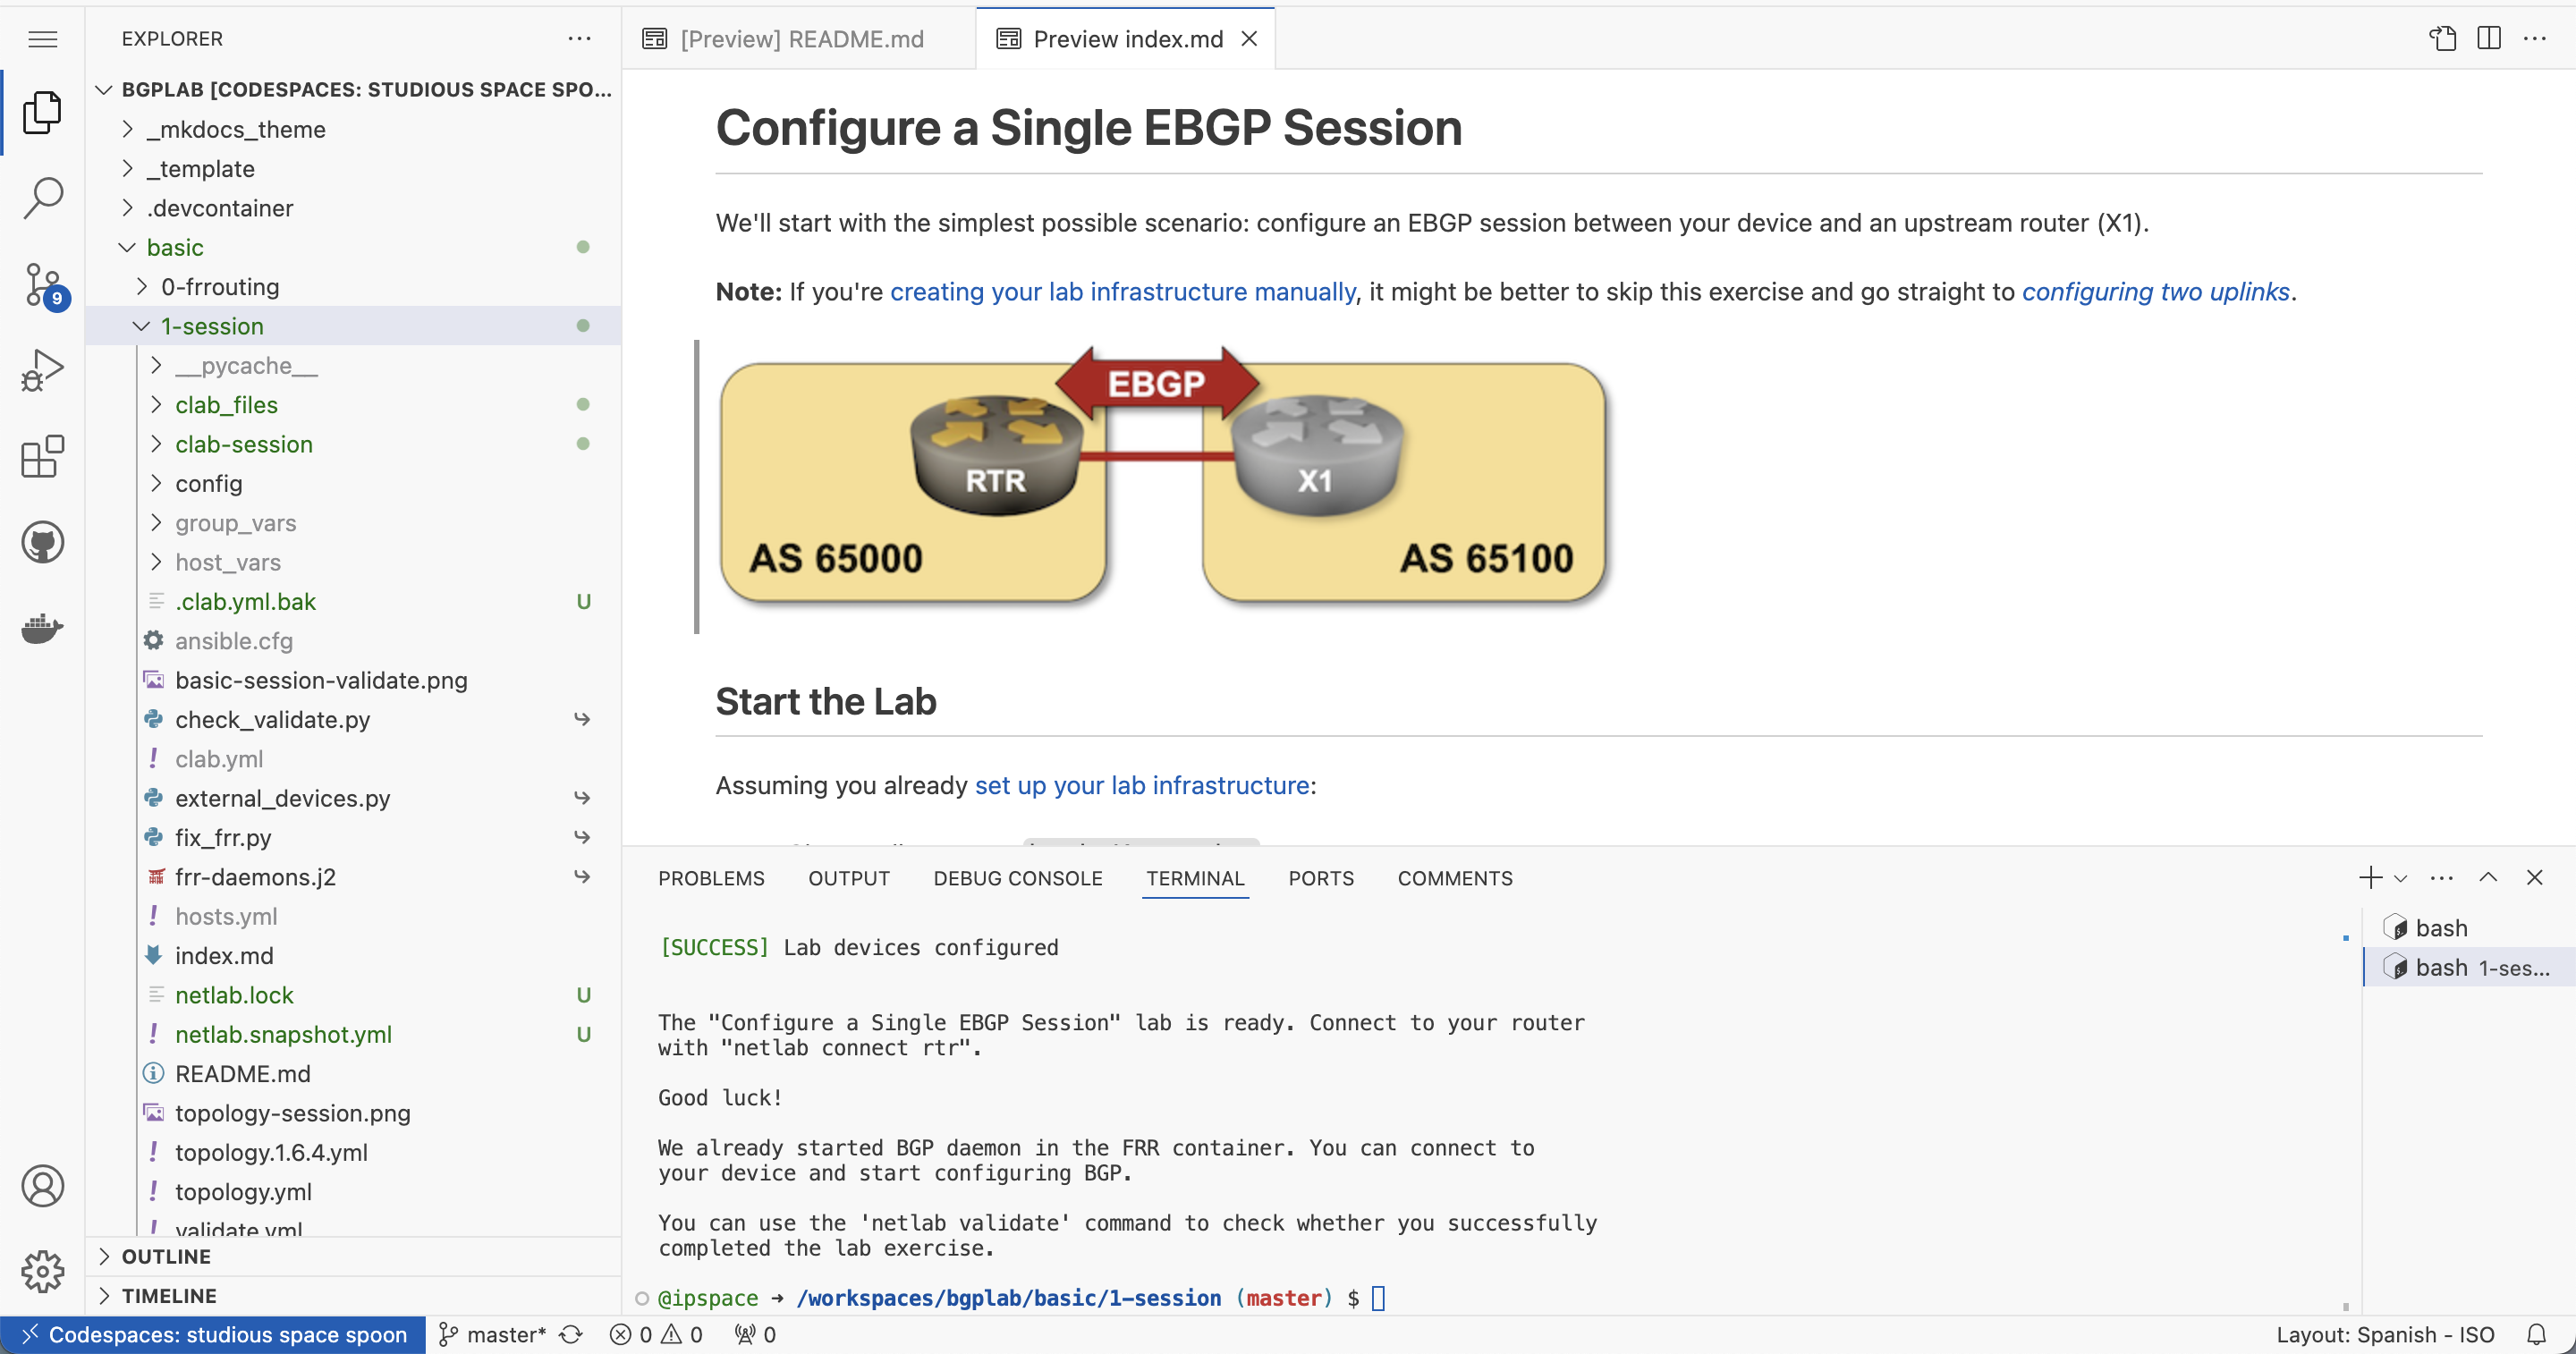
- Execute netlab up to start the lab.
- Expand the exercise folder in the Explorer tab.
- Right-click on the
README.mdfile and select “Open Preview” to open the rendered version of the file. - Click the link in the README.md file to get the exercise description in the preview pane.
- Connect to your devices with the netlab connect command executed in the Terminal pane.
Cleanup and Shutdown
Finally, don’t forget to shut down the lab with netlab down and stop your codespace after you’re done:
- Click on the blue “Codespaces” button in the bottom-left corner of the browser window.
- Select “Stop Current Codespace”. You should also adjust idle timeout and default retention period in your codespaces settings.
-
You get 120 free core hours per month or pay for more. ↩
-
Use the netlab defaults –project groups.external.device=device command to change the device type of the “external” routers. ↩